
|
Click pictures to make bigger :D 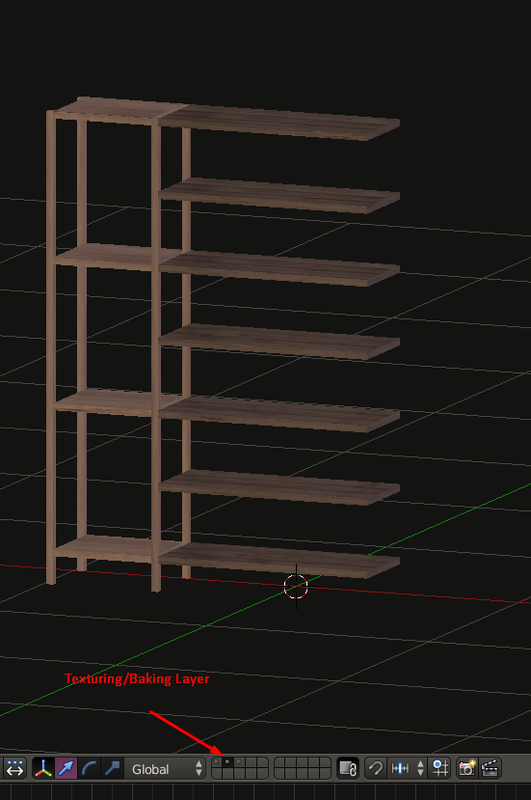 First of all make sure you're on the right layer. In our example file, we have 3 layers, the 1st is our lamp and camera, the 2nd is our editable/bakeable mesh, and the 3rd is our final completed mesh, all merged etc. This is the 2nd Layer, this is the one we need to work on.  Navigate to the texture tab in the properties panel and click the folder icon indicated to navigate to the texture of your choice.  Go to the Object Data tab and switch the UV to the Bakemap, this is the UV map we bake our texture *from*, and the UVMap is the one we bake our textures *to*. You also want to open the same texture you want to change to in the UV Editor window, so that it shows up behind the UV Layout. We can edit the UV on this without changing our other UVMap, so we can edit it to fit whatever texture we have, to scale the repeats or the angle, things like that. 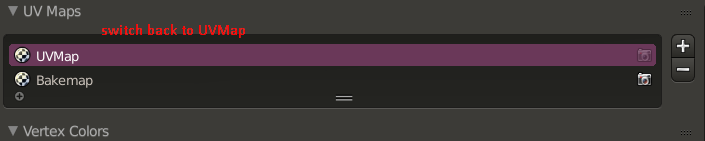 When you're done changing your texture, you want to go back to the Object Data tab and switch back to the UVMap you are baking *to*. 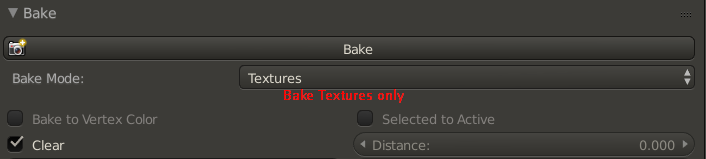 Now we can bake our textures in the Render tab under Bake, making sure that Textures is the Bake Mode selected!
|
TutorialsHere you will find my tutorials for a variety of different programs! Check the categories for different tutorial types if you can't immediately find what you are looking for! Archives
December 2015
Categories
All
|
 RSS Feed
