
|
Click pictures to make bigger :D 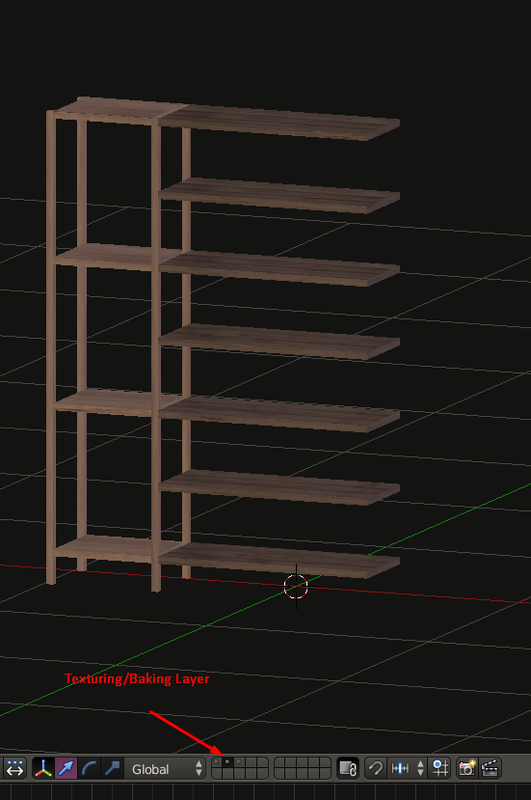 First of all make sure you're on the right layer. In our example file, we have 3 layers, the 1st is our lamp and camera, the 2nd is our editable/bakeable mesh, and the 3rd is our final completed mesh, all merged etc. This is the 2nd Layer, this is the one we need to work on.  Navigate to the texture tab in the properties panel and click the folder icon indicated to navigate to the texture of your choice.  Go to the Object Data tab and switch the UV to the Bakemap, this is the UV map we bake our texture *from*, and the UVMap is the one we bake our textures *to*. You also want to open the same texture you want to change to in the UV Editor window, so that it shows up behind the UV Layout. We can edit the UV on this without changing our other UVMap, so we can edit it to fit whatever texture we have, to scale the repeats or the angle, things like that. 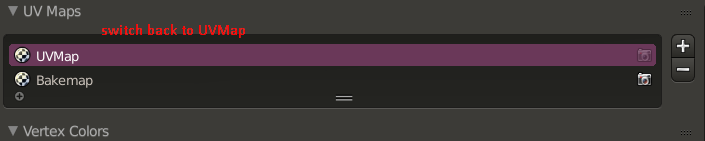 When you're done changing your texture, you want to go back to the Object Data tab and switch back to the UVMap you are baking *to*. 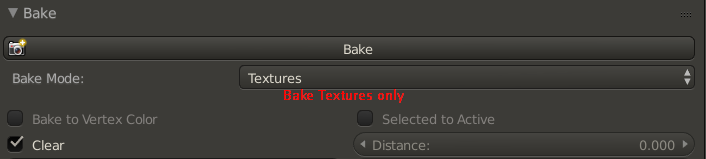 Now we can bake our textures in the Render tab under Bake, making sure that Textures is the Bake Mode selected!
This tutorial is aimed at people who are either commissioners of mesh projects, or are otherwise new to uploading models to the Second Life grid. It assumes you know basic controls of Second Life and can navigate with confidence.
I take not credit for these, my journeys into looking for how to set up my own nodes helped me get to them, so Google and the Blender Artists forum get the main credit, I'm just putting them here for personal reference, and for anyone else to see/use! Click through on the node setups for a bigger/clearer image. I'll update this page as and when I figure out different materials and stuff!
Presented as is - it's pretty self explanatory! Click through for a larger image!  This is just a quick and dirty tut on setting up HDRI maps to do the hard work in Cycles in regards to lighting, and will assume that you know how to select the Cycles Rendering engine, that's a super important step!
So in my ventures in making some nail art textures, I wanted to make some pretty cool baked beans (the theme was everything British, Baked Beans was one of my first ports of call). This isn't so much a tutorial as it is a walk through of my process, so if you're a beginner you may not completely understand, but if you're already OK with basic PS functions, you should be able to follow along. Click below the cut to see the whole thing!
At first I went into Illustrator and messed around but my beans were coming out uniform and not at all baked bean like. In the end I made some baked bean shapes modifying and duplicating an ellipse shape, moving them around until I was happy with their locations and then copied the vector shapes over to PS as a smart object. I then applied the following layer styles to this vector smart object: |
TutorialsHere you will find my tutorials for a variety of different programs! Check the categories for different tutorial types if you can't immediately find what you are looking for! Archives
December 2015
Categories
All
|
 RSS Feed
